Asphalt
Concrete
Flag paving, tiles, clinker brick and block paving
Asphalt
Concrete
Flag paving, tiles, clinker brick and block paving
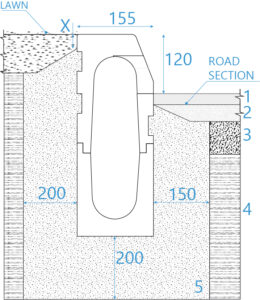
Urban street

- Sheet asphalt (ab. 4 cm)
- Lower layer (conglomerat bitumineux – BINDER, ab. 10 cm)
- Bearing layer (ab. 15 cm)
- Subfloor (ab. 50 cm)
- Concrete reinforcement layer
x > 3 cm
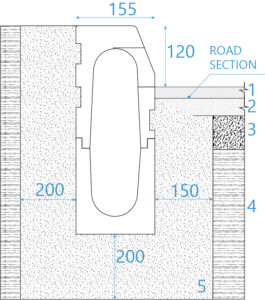
Green areas
- Sheet asphalt (ab. 4 cm)
- Lower layer (conglomerat bitumineux – BINDER, ab. 10 cm)
- Bearing layer (ab. 15 cm)
- Subfloor (ab. 50 cm)
- Concrete reinforcement layer
x > 3 cm
Extra urbane areas (heavy traffic)
- Sheet asphalt (ab. 4 cm)
- Lower layer (conglomerat bitumineux – BINDER, ab. 10 cm)
- Bearing layer (ab. 15 cm)
- Subfloor (ab. 50 cm)
- Concrete reinforcement layer
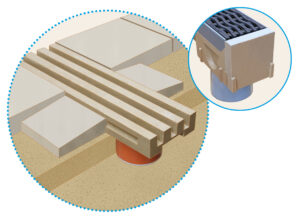
The channels are assembled against each other by means of a tongue and groove jointing system. Starting from the outlet the channel ends are fit into each other. The arrow on the channel elements indicates the direction of the water. The channel elements must be kept clean while installing. To obtain an impermeable finish the security joints must be filled up with an adapted building sealant.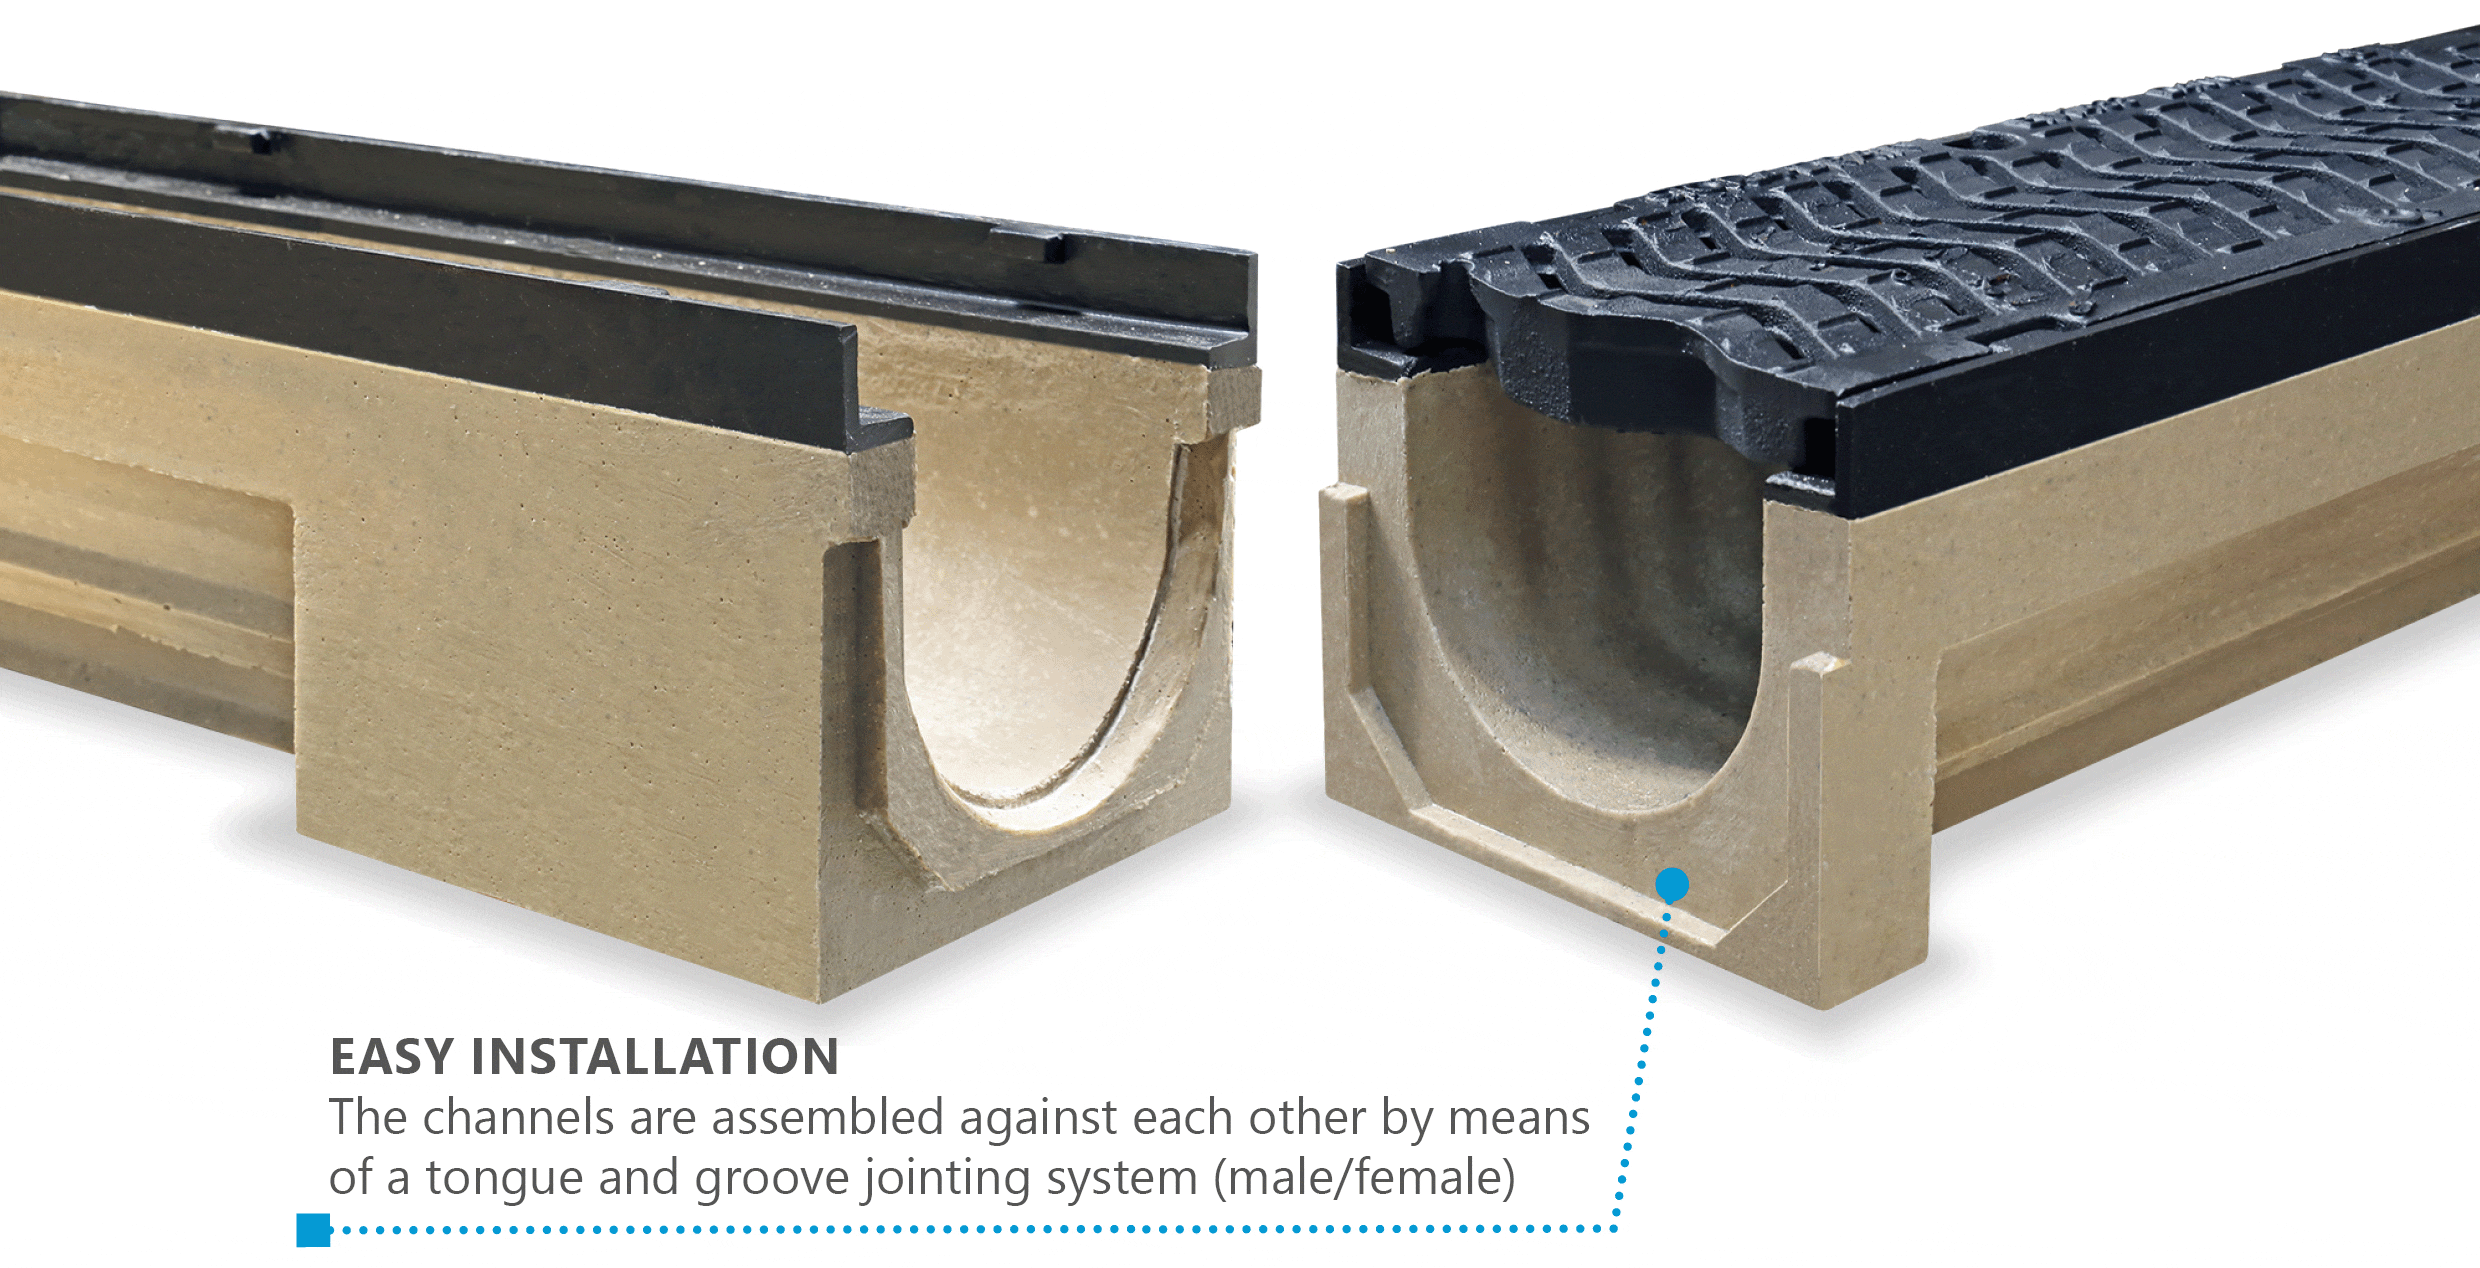
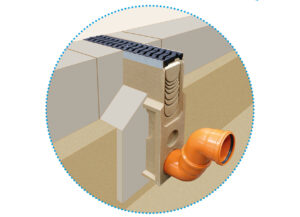 connection by means of
sump unit connection
 connection by means of
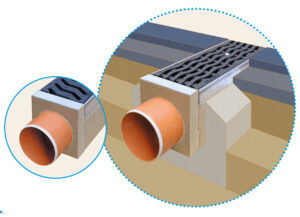
horizontal outlet connection
 connection by means of
vertical outlet connection

